My wife and I happened to be in Chicago on Monday, September 10, when we accidentally stumbled upon the new Threadless retail store just hours after it had first opened its doors. Threadless has become relatively well-known on the web, for its simple business concept of accepting contributed t-shirt designs, picking the best of the bunch, and printing up product to sell to all of us.
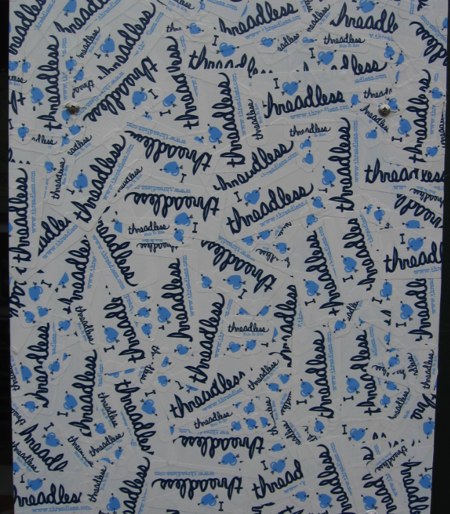
If you’ve ever visited the web site, you’ll stop dead in your tracks as we did when you notice the column of stickers where store meets street. This bit of vandalistic flair adds some rough texture to an otherwise very polished store experience.
As you might expect, I’ve been really obsessed lately with the idea of finished products, and with what makes an overall customer experience positive, whether it be in software or in the real world. What I find interesting about the Threadless retail store is that it embodies many of the same usability considerations that a piece of successful software would. It’s aesthetically pleasing and makes it easy to accomplish what you want. Heck, it even runs on the Mac!

The Threadless retail store is a product built of silicon, wood, and cloth. Just look at that awesome wood sign on the retail counter. These touches are the equivalent of pixel-perfect considerations when designing the visible elements of an application.
Perhaps what’s most interesting from a computer nerd perspective is the degree to which software literally plays into this store-product. Looking around the small, well-organized space, you’re greeted by a simple repeating UI element: a column of t-shirts with a computer screen over them. The computer screen alternates between basic information about the shirt, and pictures of people wearing it, so you can have an idea of how cool you’re going to look when you buy it.
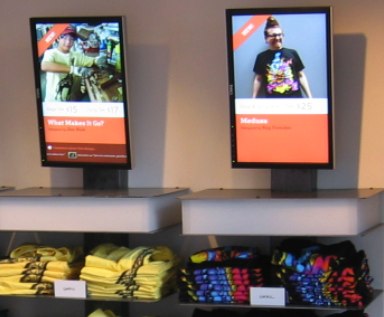
The Threadless web site has to emphasize “virtual impressions” of the shirts, because they can’t offer you the tactile experience of holding the shirt or trying it on. The retail store is a bit of the inverse. They offer giant stacks of shirts, a dressing room, and a friendly staff. Oh, and there’s also a bunch of monitors in case you are looking for just a bit more information before you finish your buying decision.
The sheer quantity of computer monitors really struck me. I can imagine bigger, less imaginative clothing retailers salivating over the idea of such a “wired” store, but being incapable of accomplishing it. First of all it’s expensive to buy a bunch of monitors (though note that they’ve used Dells instead of Apple for the multiple monitors). Second, you have to have somebody with half a technical brain-cell on board in order to make something like this work. I would guess that a store like Urban Outfitters would kill to have this kind of setup, but the chances of them making it work in all bajillion of their outlets is close to nil. This is an advantage that Threadless has in coming from the computer world to the physical world. This is just a web site that happens to have a retail store.
Most of those monitors display one-way information, but the software experience here is also interactive. Remember those Macs on the retail desk? I imagine the ones facing inward are for running the register or whatever. But the ones facing outward are all about us. So that we’ll feel loved, so we’ll have a good time, and of course, so we’ll smile when we buy the shirts.
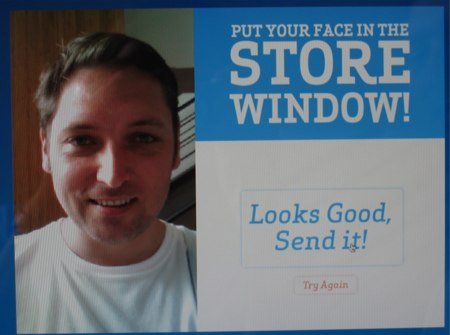
How fitting that I’m wearing a plain-white t-shirt in this photo, because the whole point of this contraption is to put customer faces on more of those tall Dell monitors. This time, ones in the front window of the store, facing the street. The monitors are arranged above real t-shirts on mannequin busts, such that customer’s face gets loaded into it, and it sort of appears like they are wearing the shirt. The sun glare when we visited was too great to capture the magic of this feature, but Flickr user littlepretty captured a night shot that conveys it well.
Putting the most unique and customer-concerned feature of your store on the street so every single person who walks by will be intrigued and impressed? That’s a darned good finishing touch.