As a Cocoa programmer, it’s easy to take for granted some of the powerful features of the framework. For instance, autoresizing subviews are a godsend! This is the feature that allows for all of those amazing Interface Builder demos where a few flags are set on the buttons and text views in a window, and they automatically resize and position themselves while their window gets resized willy-nilly by the user.
This cool effect depends on a chain of willingness by NSView to “pass along resize fever.” When a view gets resized, it optionally asks all of its children to resize, and they ask their children to do the same. If a “lazy” parent chooses not to pass the message along to its children, resizing below that node doesn’t take place. Fortunately, NSViews are by default documented to be “ambitious” in this regard.
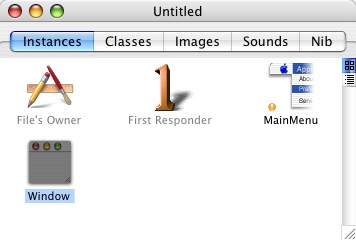
I was recently confused and perplexed by a failure of my custom views to react to the containing window’s resizing. These views are dynamically added to an empty window just after it has been loaded from a Nib, after which time I expect them to behave according to their preset resizing flags. The empty window has a very simple view hierarchy: just a plain-jane NSView designated to hold the contents of the window (which also has as a superview the window’s frame). Every time I’ve ever created a window in Interface Builder, the resizing has worked as expected. This time it doesn’t.
I double check the resizing flags on my subviews – everything is order. But they don’t respond to resizing the window! When the window resizes, the contentView of the window should resize, and my custom subviews should resize/reposition. That’s how things work! To see whether it’s something funky about my custom view, I decide to test a basic resizing scenario by adding an arbitrary subview to my empty window. I choose an NSButton and place it in the upper-right corner of my window, with its autosizing mask set so that it stays there. I run my program, and lo and behold, now *everything* works, including my custom subviews! The mere presence of the button has cured my woes. But I don’t want to leave a bogus button (or other view) in my window just to work around this problem.
I finally get the bright idea of checking the “autoresizesSubviews” flag of the window’s contentView. If somebody is responsible for setting this flag to YES, I’d like to know who it is, so I can convince them to do it for me! I add a breakpoint on NSView’s setAutoresizeSubviews: method, and relaunch my application (with the test button still in place). I land in AppKit’s nib loading code, where I confirm that parameter is YES:
#0  0x9364be24 in -[NSView setAutoresizesSubviews:] ()
#1  0x9364baf0 in -[NSIBObjectData nibInstantiateWithOwner:topLevelObjects:] ()
#2  0x93637fc4 in loadNib ()
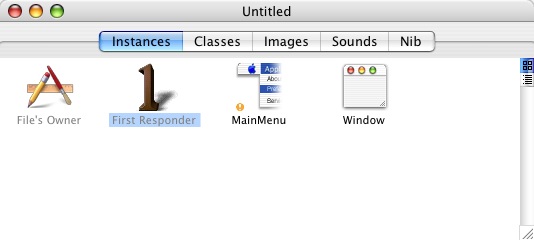
I take out the test button to compare notes against my “broken” case. Sure enough, without my bogus button, the call to setAutoresizesSubviews never gets called! Could it be that NSView is documented as automatically resizing subviews by default, but in fact depends on being set that way by the Nib loader? Since 99% of the views that people care about resizing probably start their lives in Interface Builder with subviews from the get-go, I suppose it’s possible. But the documentation says otherwise! Perhaps the documentation writer made an assumption? This is easy to test, especially since I’m already in gdb. I just create a throwaway NSView object and test the property:
(gdb) p (BOOL)[[[NSView alloc] init] autoresizesSubviews]
$11 = 1 '\001'
(gdb)
Phew! I breathe a sigh of relief to learn that yes, NSView does conform to its documentation. The setting by the Nib loader is just a paranoid double-check, I guess. So who’s doing me wrong? If a plain-jane NSView comes with autoresizing for free, and my window’s content view is a plain-jane NSView, then somebody must be setting the flag to NO on my behalf. Damn them! But we just observed that the breakpoint on setAutoresizesSubviews: never gets hit for my window’s content view. What’s going on?
It becomes clear to me that my window’s contentView was “just born wrong.” In Cocoa, an object that starts out on the wrong foot was probably archived that way. I become very suspicious of Interface Builder, who was responsible for packing up my NSView but apparently included a nasty surprise in the process of doing so. To confirm my suspicions, I attach with gdb to Interface Builder, set a breakpoint on setAutoresizesSubviews, and resave my Nib. Surely this will reveal the wrong-doing. Bzzt! I have tried and tried but witness no call by IB to setAutoresizesSubviews with a “NO” parameter.
So let’s review the facts. We’ve got a situation where an NSView’s autoresizesSubviews flag turns to NO, but no code on this known planet is culpable (at least through the exposed accessor). If the flag is turning to NO and nobody is calling the accessor, then the odds are that this is an inside job. Why would an NSView turn against itself like that?
I try to get NSWindow out of the picture. There are too many potential bullies on this playground. If the problem is that NSView objects without children get freeze-dried in IB and end up without the autoresizing flag set, then I need to simplify the test case. I create an empty NSView in IB by dragging an NSView to my document window. I don’t do anything to it. Just add an outlet instance var to my window controller, named oBadView. I break on awakeFromNib and examine the simple view from the debugging console:
(gdb) p (BOOL)[oBadView autoresizesSubviews]
$1 = 1 '\001'
Current language:  auto; currently objective-c
(gdb)
So It’s not a simple NSView issue. I further refine the test (and assure myself of sanity) by dropping a fresh NSWindow instance into my nib, and checking its contentView’s resizesSubviews flag at launch time. It suffers! Well, at least I have a simple way to explain it in the bug report.
I don’t really know where Interface Builder’s windows come from. I know that if they are instantiated in my nib, there is some voodoo freeze-drying that goes on, somewhat analogous to archiving and unarchiving objects with the NSCoder protocol. But adding a new window to my nib causes no break in NSWindow’s init methods. I figure there must be some sort of prototype freeze-dried window that gets instantiated and copied as needed to spawn new windows. But this problem is more insidious than that: if I create a window, and add items to the contentView of that window, I end up with the autoresizes flag set to YES. Now if I remove those items, the autoresizes flag is back to NO, even though I never saw a setAutoresizesSubviews call! I think there must be some kind of private IB “window object” that gets passed around and mucked with. Perhaps this object is what gets freeze-dried and turned magically into a true NSWindow only after my app launches.
I’m not one to give up easily, but in this case, I admit it: this bug has bested me. Considering the workaround is as easy as sending a “setAutoresizesSubviews:YES” message to my window’s content view at nib awakening, I’m happy to let the Interface Builder team at Apple figure out the finer details. (Radar 4290256).